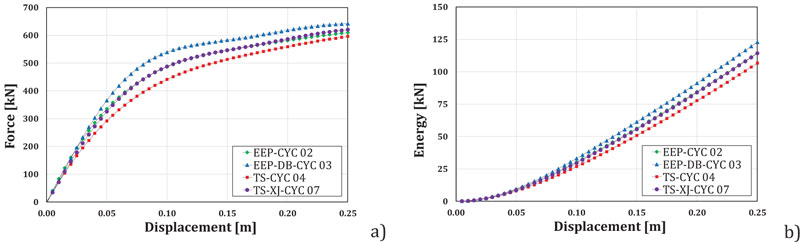
Fig. (10)
Comparison between the IDA curves in terms of
a
) Force-displacement;
b
) dissipated energy up to failure