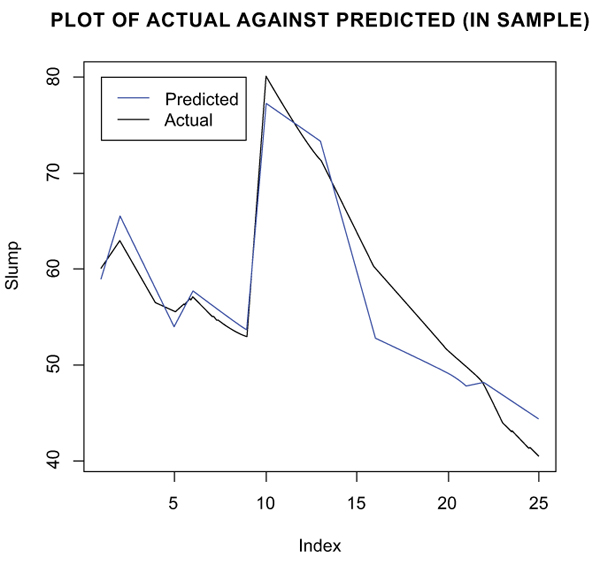
Fig. (10)
Comparison between actual and predicted slump results (training).