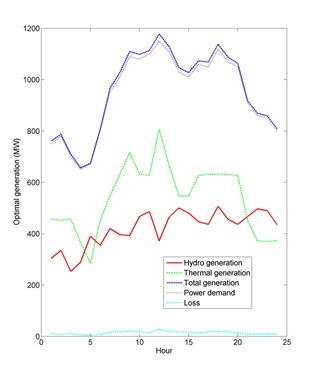
Fig. (8)
Optimal power generation and load demand for case 2.